Hey everyone!
Wanted to share this short little video I made on using grouping to teach division and fractions! As you can see in the video, I used poker chips. My three year old son and his four year old friend quickly caught on to the idea of grouping large numbers into smaller groups, and the amounts that resulted. Surprised to see a three year old figuring out division? It's easy this way! Check out the video and try at home!
How to do this:
Put objects out and show child how to make groups of 2, 3 and so on.
When you put the total chips out, say, "Let's divide (9) by (3). Make groups of three."
Then, when you are done, count the total groups and repeat to the child, "9 divided by three equals three. Three groups of three make nine. Let's count each chip!"
Repeat this process frequently and with different numbers to sharpen math skills!

Hello everyone! Just popping in to give you a few quick ideas for some fun Halloween themed art and math, and also a few recycled play ideas and book suggestions!
Hope you enjoy and have a safe and fun Halloween!
______________________________________________
Paper Plate Pumpkin
It's a no brainer! Take some orange (or red and yellow if you'd like to include a lesson on color mixing) paint, white glue and shaving cream and mix some neato "poofy" paint.
Paint your paper plate and glue black triangles and mouth shapes to make a jack o' lantern.
I cut a spiral out of green paper for the vines, which my son wanted to glue on as "arms". :)
The added idea for motor strength would be to have your child cut their own shapes out of black paper with child safe scissors! Fun and easy, plus cute to display! Candy Corn Math
Something yummy always makes math fun! As you can see from the picture, what I did was take a ziploc bag, and place 10 dots on the outside, along with the number "10" using a permanent marker. I then put 10 peices of candy corn in the bag.
Have fun counting all of your peices, adding and subtracting peices, and learning math in this "sweet" way. The best part is that you get to eat it when you are all done! Kids love it. Try this activity with larger numbers, multiplication or fractions for older children!
Recycled Cereal Box Play Houses
I got this idea from a great book I have called "365 TV-Free Activities (You Can Do With Your Child)" (Bennett, Bob Adams Inc, 1991).
Check it out here: http://www.amazon.com/365-TV-Free-Activities-Your-Child/dp/1558505857.


The idea is to take your recycled cereal (or mashed potato, cracker, etc.) and cut doors and windows in them, to create play houses! I turned mine inside and taped them back up out so that we could draw on them. This is an awesome open ended project--get out the scissors, tape, crayons and markers and have a blast! Not only do they look neat when you are done, but it is a free and creative activity that your child will love.
The play houses are as elaborate as you'd like them to be...we even made steps for ours! They look neat when lined up into a little "neighborhood". Try it!
_______________________________
In closing, a few book suggestions that we've enjoyed reading! These should be available at your local library:
Bats at the Library
http://www.amazon.com/Bats-at-Library-Brian-Lies/dp/061899923X
Bats love to read too...and they've flown in through an open window at the library!
Too Many Pumpkins
http://www.amazon.com/Too-Many-Pumpkins-Linda-White/dp/0823413209
An overgrowth of pumpkins!
Pumpkin Soup
http://www.amazon.com/Pumpkin-Soup-Helen-Cooper/dp/0374460310/ref=pd_sim_b_7
A story of friendship and tasty pumpkin soup!


In our adult years, calculus and trigonometry put a damper on passion for math...for many of us, anyhow. :) A college math professor of mine said something very profound about this passion for math. "At some point in your life, someone ruined math for you. Don't be the teacher that does this to another child." How true!
As parents and teachers, we need to be the inspiration for our child's math skills. Know that math and pre-math skills do NOT start at the elementary level...it starts NOW! I'd like to outline in this blog some ideas for you, from infancy until preschool, on how to incorporate lessons into your young child's life--and along with it, a passion for mathematics!
INFANTS AND VERY YOUNG TODDLERS
Math isn't just about counting--it's about reasoning, logic, and matching as well. Activities that you can do with your baby all the way into toddlerhood include:
-Counting simple objects at every opportunity
-Matching things: Pairs of shoes, flashcards, two of anything you can find. Start with small amounts and then work your way into more objects and more subtle differences. You will be amazed at how your young child can match!
-Measuring: scoop, pour and spoon. Use water, rice, peas, sand, cereal, or whatever other material that your child can safely use. For the young baby who is still "oral", try edible items like cheerios.
Here is a great printable just in time for Halloween--goofy teeth matching! :)
Goofy Tooth Match
Also, here is a great article on turning "bath time" into "math time"!
Bath Math
PRESCHOOLERS
The preschool age child will enjoy all the activities above--but you can take it to the next level with more exposure to numbers, more advanced concepts, and more opportunities to count.
-Seriation and patterning: Simple activities can promote these ideas. Seriation is the successive patterning of objects, such as small to large. Even making something as simple as a snowman--three white circles, small, medium and large--can help facilitate these ideas. A caterpillar with successively large or small circles as the body also works. You can cut out shapes of any kind and ask your child to arrange or glue them to paper in the order of small to large, or large to small. Patterning, ofcourse, is trying a different pattern. Try a very simple pattern to start, for example: red circle, blue square. Preschool age children will catch on very quickly. Take things slowly and add more pattern peices as your child is ready. This is also a great way to introduce shapes!
-Time as a math concept: Count calendar days with your child each day to help them understand how numbers relate to time and our everyday lives. Try using a kitchen timer to help them understand concepts of time. You can say things like, "Let's see if we can pick up these blocks in one minute, by the time the bell rings." Not only is is an effective tool for transitioning and directing children, but it helps to cement the idea of minutes and the concept of time. Point out the hands on a clock to your child and talk about your daily schedule--what happens when. Not only is this directly relative to numbers, but it is also a part of patterning.
-How math relates to the individual: How old is your child? What is their birthday? What is their address? Phone number? Not only this is information important for them to learn for personal safety, it is basic MATH!
-Make counting fun: Try different themes for counting. For example, Halloween is around the corner. This week, for my son, I took a plastic baggy and marked it with the number "10" with a magic marker. I told him he could have a treat if he could count 10 candy corn and put them into his bag. He was more than happy to comply! =)
Make counting cups--recyled plastic applesauce cups or baby food jars wtih permanent marker dots on them to signify numbers. Use beans, candy, or other small objects like paper clips to count things out.
-Ask how many. Use each opportunity to help your child classify, count and identify objects. Ask them to be descriptive.
Dont waste any teachable moment, and you will be on the road to creating a little math wizard!
Check out these additional resources for great preschool math ideas!
Preschool theme: Counting and Numbers
PreK Smarties
Hundreds of themed preschool math ideas on PerpetualPreschool.com
Preschool Math Printables (Worksheets)
And finally, one book suggestion that has a CD with songs and also manipulatives graphics to print! I own this book and let me tell you--kids LOVE it. It is so wonderful! "Math Magic" for ages 3-7
111 pg book with CD
Burton and Campbell
Order here: Order Math Magic at Songsforteaching.com
Your Baby Can Read
Should you spend money on this product? Not sure if you've seen the commercials or not, but the idea is that you can teach your infant or child to read. Is it a scam? No way! This is totally possible. But know two things: 1)This is sight reading (the first stage of reading) and not phonetic reading and 2)You can do this at home for free!
I've been working on words with my son since before his 2nd birthday. Simply being consistent with flashcards or writing on paper can do the trick! But here are some free ideas to get you started on early reading skills!
WORD BOX: I took a diaper wipe box and filled it with cardboard squares. Each square had a simple word written on it, and I used 4-5 different permanent marker colors to provide variety and help my son distinguish/memorize the words. What words did I use? Words that are meaningful to him. Things that are in his world, or things he enjoys, along with simple basic words that any child could learn to recognize (like cup, or mom). I even tossed in bigger words that had special meaning to him.
NAME TIP: In teaching your child how to read or recognize their name, make up a song that spells the word. I used the tune of Old MacDonald for my son. "E-M-M, E-T-T. That spells Emmett." He sings this song to himself and now recognizes what word is spelled with them, all because of the tune!
BE A TECH NERD Use your digital resources! I love using Microsoft Office's "Power Point" to teach my son because it is colorful, easy to use, and he can also utilize basic computer skills (like pressing the arrow buttons) to control the slide show himself. Here is an example of a Power Point file with some of the words Emmett has been working on (feel free to save and modify for your own use!):
"First Words" Power
Point Presentation
*please note, you will need Mic. PowerPoint application to use this file
__________________________________
FUN STUFF
Sensory Ideas
Salt Tray:
Take a shallow tray or cookie sheet and cover with plain old table salt! Practice drawing and making shapes and letters in the salt. It provides the neatest texture that might surprise you! Holds shapes well and gives kids such a neat sensory experience.
Water Tray:
You don't need a large water table or a bathtub for water play! Even a shallow dish of water will provide hours of fun. I'm always talking about water play but it's so wonderful for the young child. It's not just about splashing and making a mess! Provide animals for dramatic play. Provide pitchers, spoons and cups so that your child can learn about problem solving, and spacial concepts--all while honing their fine motor skills! Put out the dish towels and expect a little mess....it's fun!
___________________________________________
THE ARTIST'S PALETTE and SPONGE PAINTING
Put out a plate with dabs of rainbow colors. Provide your child with small sponges in different shapes and show them how to make prints on their paper. You can buy precut shapes but it is just as easy to buy a pack of Cello sponges yourself and cut out your child's favorite shapes!
___________________________________________
GAME SUGGESTION
Red light, Green light
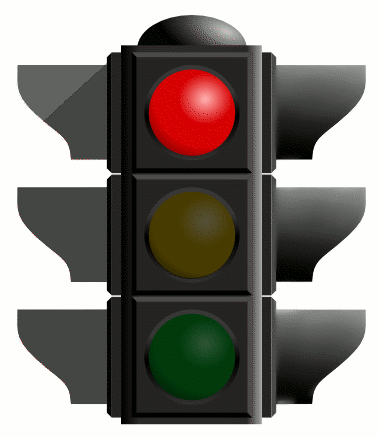
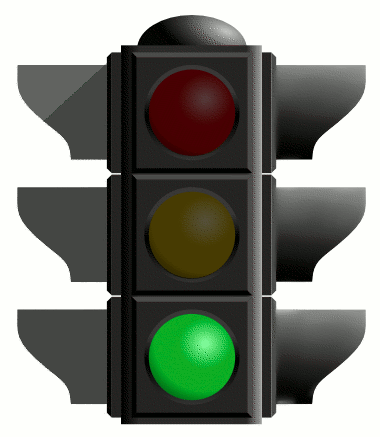
Does your child know what traffic lights mean? Bet you've forgotten about this fun, simple game that is so much fun for kids! You don't need to use a prop for this game but it is fun to make and kids can help! I simply printed out two identical pictures of traffic light clip art and stapled it to a cardboard rectangle. Here are two great (and free) pieces of clipart for you!
Red Light | Green Light
How to play: Your child can be on foot or on a bicycle, scooter, etc. Show them a starting point and make sure they understand the concept of "Red light means stop, Green light means go". Shout "Green Light" and encourage them to move forward to the goal (where you are standing) and "Red Light" to stop. My students in the past enjoyed when I turned my back to them for green, and jumped around suddenly for red. If you have a sign, it provides a great visual!
Expect a lot of giggles and a little cheating. You will get requests from now on to play this in the driveway. Free and fun! :)

Sometimes, to have REAL fun, you've got to get dirty. Don't be afraid to try some of these very fun activities at home...even if it makes a bit of a mess, it will also make a permanent memory in your child's mind. It's ok to get dirty sometimes! Hands can be washed, floors can be vacuumed, and countertops and tables can be scrubbed...so let go of your inhibitions and HAVE A BLAST!  CONSTRUCTION TIME Get all of your scoopers, pourers, loaders, dumptrucks and backhoes together and get ready for a great time! Any substance can be used for filling and dumping but with younger kids I like to use cereal and edibles! Here we used cornflakes. It was so much fun to scoop, pour and drive the trucks around. Clean up was a breeze because we did the acitivity on a blanket.
Think this activity isn't for your little girl? THINK AGAIN! ALL kids will love to do this activity. What are we learning here? Problem solving, measuring and pre-math skills, cooperation, and even spatial development. Do expose your little girl to activities like this to help her work on these skills!
Rainbow Recycled Crayons
Have a ton of broken and discarded crayons rolling around the bottom of the art box? Try this fun activity!
You'll need:
-Some play hammers or perhaps a meat tenderizer (mom needs to help a bit on this one)
-two long sheets of wax paper
-broken and discarded crayons
-muffin tin
Set your oven on a low temp, around 200 degrees or so.
Remove ALL paper bits from discarded crayons. Break crayons into smaller bits. Hammer for extra fun! Peices can be large and small--variety is fun with this project! Do not break peices any smaller than the size of a fingernail, for lack of a better comparison.
When you are done, fill muffin trays and place in oven. Kids can help choose special color combinations they might like! WATCH CAREFULLY! You don't want the crayons to melt all the way--too high of heat or too long in the oven will produce a completely melted wax, which ruins the rainbow effect. Similiar to a chocolate chip cookie, you are looking for the different color peices to have just melted together.
Remove from oven and let cool completely. When cool, disc shaped recycle crayons will pop out from muffin tin! Tin will need to be scrubbed well with soap and hot water before using for food again.
Crayons will make neat rainbow colored marks on paper! Easy for young toddlers/preschoolers to use and earth friendly! :) Bird Seed Table
Don't forget about sensory play! We have a homeade water table (search my blog for how to make one of your own!!!), but you don't need that--all you need is a tub, large pan, or even box! Fill with bird seed or another substance like cheerios, popcorn, or colored macaroni (see recipe below). REMEMBER: These items will be a choking hazard for children under 2 1/2, or those who are still "oral".
Colored Macaroni
Here's how to make your own colored macaroni--for sensory table play, sorting or art projects. It's great to have on hand for a rainy day!
__________
Materials:
uncooked pasta (macaroni or other shapes)
rubbing alcohol
food coloring (drops or paste)
In a ziploc bag or bowl, pour in enough rubbing alcohol so the noodles are lightly covered but not soaking (about 2 to 4 Tbsp)
Add a lot of food coloring to each bowl Use a separate bag/bowl for each color
Add the desired amount of macaroni (this depends on how many kids/crafts you're making).
Mix them up (or shake the ziploc bag) and let sit a couple of minutes.
Once the noodles have reached the desired color, remove them from the baggie or bowl and lay them in a single layer on tinfoil or waxed paper to dry.
Making the colored noodles is messy and food color doesn't come out of clothes well... the shaking part can be done by kids (if you use a ziploc bag), but the rest should be done by an adult.
________________
Channy's tips on this one:
-Crack a window, this gets stinky! Haha!
-Drying on paper towel is ok, as long as you place on cookie sheet or something else. Don't place these noodles on a paper towel to dry on your counter...because they WILL most likely stain it.
-Find neat pasta shapes, like wagon wheels, in the ethnic areas at your grocery.
-Browns, blacks dark blues and purples can be tricky...don't make you dye too dark. One thing I've learned from dying lots of pasta over the years is that green, red, yellow, orange, turquoise and pink always come out beautifully! A lighter dye is usually more successful.
Once you've made a large stash, you won't need to for quite some time again. Colored noodles are actually quite beautiful and vibrant...perfect to keep on hand for jewelry making, art or many other purposes! Enjoy!

St. Patricks Day fun!
I'm an irish gal born the day before St. Patty's day...so I love the holiday! :)
It can be so much fun with young children!
I'd like to share some early childhood ideas that I've used every year in my classroom and with my son!
__________________ Shamrock Shakes:
Make your own shamrock shake with milk and Mint Chocolate Chip Ice Cream. Blend in a blender and for extra color add a bit of green food coloring!
Minty Water Play
Water play is always fun...but it is especially arousing for the senses when you add essences! In a tub or bowl of water, add a few drops of mint oil and allow your child to play with their favorite water toys or measuring utensils.
Pot Of Gold
It is so much fun to collect rocks outside and spray paint them gold for counting. After gold paint has dried, mark nuggets with permanent marker (1, 2, 3) or with black colored dots for a fun, St. Patty's day inspired math activity!
Blue and Yellow Make Green
St. Patrick's day is a perfect opportunity to discuss colors! Try squirting yellow and blue tempera paint on paper, or a smooth surface with shaving cream, and allow your child to smear them together to understand this effect on their own!
Suggested Reading
Little Blue and Little Yellow by Leo Leoni
The perfect book for a precursor to discovering green...and one of my favorites! A story of two "color friends". :)
Green Pepper Printing
Cut a green pepper directly down the middle to make a shamrock shape! Place on a shallow tray of green paint and make Shamrock Pepper Prints!
Lucky Charms Sorting and Counting
Buy a box of lucky charms and sort all of the different marshmallow shapes. Count and graph them! Older kids will LOVE this activity.
Two Cute St. Patty's Day Songs
Song for St. Patrick's Day:
To the Tune of The Bear Went Over the Mountain
We're wearing green for the Irish We're wearing green for the Irish We're wearing green for the Irish On this St. Patrick's Day
We'll dance a jig for the Irish We'll dance a jig for the Irish We'll dance a jig for the Irish On this St. Patrick's Day
Me Mither and Fither were Irish Me Mither and Fither were Irish Me Mither and Fither were Irish And I am Irish too
We kept a pig in the parlor We kept a pig in the parlor We kept a pig in the parlor And he is Irish too.
And if you like the leprechaun concept...
I'm a little Leprechaun
To the tune of I'm a Little Teapot
I'm a little leprechaun dressed in green
the tiniest man that you've ever seen.
If you ever catch me so it's told
I'll give you my pot of Gold!
Large Motor Idea
Get some exercise and gross motor practice--great for any age! Trace green footsteps on paper and tape to the floor. Use for a treasure hunt, or just to walk and follow. Toddlers learning to walk will have so much fun following the prints. Older kids can "dance a jig" and follow more advanced footstep directions!
Better yet and if you dare...
Stretch out a large sheet of butcher paper, paint or stamp feet green, and dance to irish music. Make sure to display your fancy footwork afterward! :)
EXTRA RESOURCES
Printable St. Pat's maze for your older child
Maze
Lots of St. Patrick's Day Coloring Pages
Coloring Pages
I hope you've enjoyed these activities and have fun with your little one on St. Patrick's Day! :)
Your Preschool and Daycare Questions Answered!
Hello everyone!
Almost all of us with young children have questions concerning daycare and preschool! I've compiled some forum member's questions to help address some common issues. Thanks for your responses and questions!
Q. "I am having potty training issues with daycare. I don't know how to ask about it though. Basically when Ky started in the toddler room they said that when I decided to start PTing they would help. Well Ky is nearly fully PTed at home (minus night time) and has no problem. But with 11 other kids to play with and take turns using the potty with, they seem like they are too busy to help her PT. I keep getting "oh well she'll start asking us eventually, she's still so young yet". I know WHY she doesn't tell them at school, but what are some ways I could get the daycare teachers to help me? There's only 2 other girls in there that use the potty at school! So it's not like ALL 12 kids are needing to be asked if they have to go potty or needing extra potty trips. I want them to work with me but they don't seem to be. They let her try to use the potty at every diaper change, and she typically pees in the potty, but still has a wet diaper. So basically, I want to know how I can get the daycare to help me and how I can help Ky recognize and be more vocal about pottying. NONE of the kids there are completely PTed. Most of them are under 2.5 yrs except for 2 of them. Any tips and tricks??"
A. From working in a toddler room, I know firsthand that potty training can be hard. Children are at different levels, and different systems at home. This is a typical concern from parents and it's very normal to see children doing better with PT at home--not only because parents can give more individual attention, but also because children are distracted at school and wait/choose not to go, so they won't miss something!
My suggestion would be to change the system. Not just at daycare, but at home. This way Kyliana will know exactly what to do. A great way to do this is to buy or find two kitchen timers that are exactly the same. You can almost always find them at the dollar store!
Set a time limit that is realistic. Teachers won't have time to ask Ky every thirty minutes, nor probably each hour. I think every 90 minutes-2 hours is a reasonable request, beyond the normal potty times/diaper changes they are doing at school.
When the bell rings, say, "time to potty" or use the sign for bathroom. Do the exact same routine every time. As Kyliana gets older and better with holding it, the time inbetween asking can be elongated until the system isn't needed at all, and she self regulates.
Write this system down, and bring the second timer into the daycare. Explain how it is working for you at home, and that you would really appreciate it if you would help with consistency.
Finally, from a daycare/preschool teacher's perspective, doing this while watching 12 other toddlers really is hard work! If your teachers are willing to work with you and you see improvement, make sure you "grease" the wheel by offering a heartfelt thank you or maybe even a quick thank you card or note. Hope that helps!:)
Q.
What kind of questions do you ask when you are going to veiw a daycare?
A. There are so many! I'll cover a few of the main ones, and offer a few good printable links that you may want to bring with you when shopping for a daycare.
1. Is this center licensed? Unless you have a family member or other arrangement made, this answer should be yes--even if it is a home center!
2. Are teachers and staff first aid certified and trained in CPR? What are their educational requirements? In most states, centers are required to have a certain number of staff (including lead teachers and the program directer) educated with, minimally, a child development associates degree (cda) or an early childhood development bachelors. There are several different forms of degrees but the minimum is usually a two year degree.
3. Are lesson plans and classroom events made available to parents? Where can parents access this information and learn about what is being taught to their children? This is often a joint effort. Sometimes when parents don't ask, they don't recieve--although in my opinion, a good teacher will work hard to make these things very accessible.
4. What is the staff or caregiver ratio, per child age group? The answer to this varies by state, but you can visit goverment websites or call your local family indepence agency or children resource network to ask about local licensing centers. They can give you the numbers per age group. When asked, ALL staff should know the answer for the age group they work with.
5. How is discipline handled? This is important. Ofcourse, we always want to know that corporate or physical punishment is never used. This is especially important to ask in home settings where it may not be as obvious/public what is being done to discipline children. But beyond that, as a parent, I like to hear that redirection and positive guidance are used. Do some reading on what you believe is right, and make sure your daycare complies with that!
Other things to ask about: The food program, how children are discharged, how holidays are handled, etc! Check out these great resources for more answers:
Daycare QuickTips
Daycare Qs
Q. Is preschool absolutely necessary?
A. Well...in a nutshell....no. But what kind of stimulation will you provide for your child? Be honest with yourself and ask yourself these questions:
For at least a year or two before kindergarten starts, will I provide ample time for my child to socialize with other children and adults, so they may build social skills?
Will I provide regular stimulation through reading, art, sensory, science, etc. at home?
Will I teach my child self help skills (one of the most important things pre-k) such as how to dress, put on shoes, follow directions, and listen?
If you know that you may not have time or the drive to do these things with your child (which doesn't make you a bad parent! Maybe you are a working parent, or you are unclear as to what you should be doing), then preschool is probably a great option for you, should you be able to afford it!
If you answered yes to all of these questions, then preschool probably isn't necessary. Would it still benefit your child tremendously if you enrolled them in a quality program?
YES YES YES!
Kindergarten teachers won't expect your child to have serious academic skills when entering kindergarten. But they will be expecting social and self help skills, and some basic other things as well.
I am 100% a full advocate of preschool at an early age--a part time two's program, and 2-3 day per week 3 and 4 year old program.
So, as you can see, this topic is quite complex! But I hope I've helped shed some light. :)
Q. Meredith has started going to Sunday school now that she is old enough, in fact today was her first day. I wanted to sit in on a couple of classes just to observe and see how Meredith behaves around the children and everything. The teachers were suggesting I leave so that she can get used to being in the class alone and won't get distracted. Today she didn't even notice I was there, I don't think she looked for me once. I think it would be okay for me to watch from behind, but they seemed insistant that I leave. Do you think it's a good idea for me to sit in or should I just leave the room every sunday? I know it is good for her to be separated from me every now and then so she can get used to it, but if she doesn't know I'm there then I don't think it really matters. What do you think?
A. I personally don't think you observing a few classes is anything that will cause ill effect, especially if your daughter is uninterested that you are there!:)
Teachers need to remember that seperation is hard for the parent too. Your teachers should work hard to provide you with comfort and knowledge about how your child's day will go, and observing is all part of that process.
I've always had an "open door" policy with parents. I think it is a good thing. Ofcourse--there is a flip side. If you always wanted to be there, and it became a habit--yes, that would be negative for your daughter because it might distract her, but also, might make teachers feel uncomfortable an unable to do their job. A constant observer makes us all a little uneasy at times.
Perhaps what you are really craving is more info on what types of activites Meredith will be engaging in, and how the classroom in general is run and operated. Ask your teachers about this and hopefully, they can produce something for you to help you understand more about their program.
Ultimately in Sunday school, daycare or preschool, the object of the game is parent/teacher communication. If that is constantly a problem, it may be time to check out some new facilities. Hope that helps to answer your question.
Thanks again everyone for your great questions about childcare. I will look forward to another Q&A style blog in the future!:)
Play Area Suggestions
Quite often I get messages from members asking what I suggest they put up in their play areas to help facilitate their child's learning. I decided to put up this blog with a few suggestions on how you can create an enticing play area for your child without buying much of anything at all, and some important tips to keep things organized and safe!
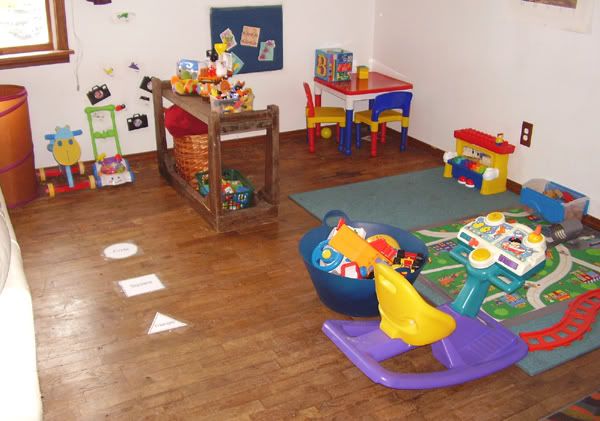
*As an example I'd like to share a photo of my son's play area in his livingroom. It is one of a few in our house including a large motor area in the basement, and his bedroom play area. The Q & A style article below talks about the different elements here.
PLAY AREA IDEAS AND THOUGHTS
Q. What is the purpose of creating centers--why not just push toys up against the wall or put them in a toy chest?
A.When toys are in a toy chest, they are hidden away. Many times kids will create a gigantic mess just to get to the one toy they wanted, which ofcourse, was at the bottom! For this reason, I'm not a big fan. I don't mind having toys out on display because it actually keeps an area cleaner in the end, and looks better, all while teaching children better organizational skills and care while cleaning up after their toys.
So, why not push the toys up against the wall? Well, that's great for a large motor area. But for an area with centers and or limited space, it's definitely a bad idea for toddlers. Open space=running space. If you'd like to create a play sanctuary for your child that they will play in, and not just run wild like a monkey in, then you might want to consider adding some interest by creating centers, or themed "nooks". Not only does it look more attractive but it really does help create focus in certain areas, while the child is playing. The goal is to break up the room with toys and shelves in a way that prevents excess running but never impedes your view of the child for safety.
Q. Should I cover the walls in posters and learning materials?
A. No. Some is great--too much will be overstimulating to your child. Think minimal when it comes to wall hangings, posters, etc.
Q. What are "centers", and how can I create them?
A. Centers are themed learning areas. In my son's play area, I created an area to use manipulatives and blocks (the corner table), a transportation area (the rug area which contains a transportation rug, climb on driving toys, and buckets of transportation toys), a dramatic play area (the shelf which contains play pirate ship, plastic container full of play figures, puppets, etc.), and a large motor section on the opposing side of the shelf which has scooters, push lawn mower toy, tunnel for crawling through, and a ball pit.
Also pictured is his felt board, which is currently a transportation theme. I change it every month or so for something new.
Because my son is only 15 months old, the centers are very basic. His room is very similiar although he has different centers there--a reading area, a science area on his little desk, etc.
We've also created a "book nook" in the living room for our son so that he can relax and read while we relax on the couches. He uses this area very often!
OTHER PLAY ROOM IDEAS:
-Floor space is learning space too! If you aren't afraid to try it, masking tape on the floor can be fashioned into a road to drive cars on. Or, perhaps just a shape to walk along, like a straight line for example! It's great exercise to help your toddler balance on this line and serves as an opportunity to really imagine wonderful things. ("We're walking on a tight rope now!!!")
I like to put shapes on the floor and I use them in many different ways. To stand on, or to place objects on, to sort shapes with, etc.!
-Get creative and use the element of surprise. Plan ahead and know that you will be most succesful in creating a new area for your child while they sleep at night and not while they are awake during the day, LOL! It is so much fun for them to be surprised in their play area the next day. Make a tent area by draping scarves, or a "cooking" area on a small table.
-Change themes often, or add new items.
-Add seasonal items to your child's play area. We remember to do this with our decorations, but no so much our child's toys--and often, the child isn't allowed to play with the seasonal things they covet with all their heart.:)
Try something new and you can't lose! By taking some time to create a learning environment for your child, you are taking the most positive step in preparing them for preschool, and "big kid" school.
Easy to make feltboards, spiders and more!
Because the Halloween season is upon us, I'll kick it off with the spider crafts!!!!:)
Paper towel or toilet paper tube Spider Prints
To make these quick and cute spider prints, all you need to do is take a tube and cut it into eight segments, and then fold the "spider legs" out, so that the tube becomes a stamp when dipped into paint! Emmett and I did black paint on white paper and added a glitter web, although white paint looks great on black as well! He enjoyed helping to stamp the tube in the paint and on the paper, but ofcourse this is a "parent pleaser" and is fun for both parent and child. Older kids can go crazy on their own! After stamping a few spiders with me, I gave my son a sheet of paper and allowed him to fingerpaint all over, which was what he really wanted to do. Haha!:)
OTHER SPIDER PROJECTS:
Marble Web Painting--place a black piece of paper in a tray with a marble dipped in white paint, and roll back and forth to achieve a spider web! Infants and toddlers can do this project a little more safely if you cut a circular peice of paper and put it into a tin with a lid. That way they can shake it and let the marble go crazy without fear of the choking hazard popping out! Older kids will enjoy controlling the web, and it is a great exercise for large motor and hand/eye coordination.
Double handprint spiders--place handprint facing left, then another handprint directly next to it facing right. The two thumbrints become the spider eyes, and then you have eight legs! Especially cute when you glue googly eyes on the thumbprints.
FELTBOARD AT HOME!
This is one make at home project that I highly recommend having! The felt, or flannel board, is so much fun and a wonderful teaching tool!
I made this one by taking some blue burlap and covering a large square of cardboard. (You can also use felt or flannel material.) I then stapled and taped over the back of it, and taped it to the wall at eye level for my son. He likes to stand at it and take the shapes on and off.:)
You can cut out lots of felt shapes or make seasonal themes (like pumpkins, Christmas trees, etc.) I will add felt board activities here from time to time now that I have posted how to make one! They are a great way to illustrate stories, sing songs, or just have fun naming shapes and colors. Easy for little hands to do, although older kids enjoy them very much as well!
CHEAP FELTBOARD TIP #1--the shapes you see on my feltboard are actually cut from pot scrubbers! I get them in a multicolor pack, five for a buck, at the dollar store! They are made from an industrial material that sticks to felt. It feels quite similiar to felt/burlap. I think you will find what I am talking about if you take a look in the stores!
CHEAP FELTBOARD TIP #2--You can also laminate paper shapes and glue or staple a piece of felt, or the scratchy side of a velcro strip, to the back to make it stick to your feltboard! This is great for acting out characters from a story because you can simply photocopy pages from a book!
FOLLOW ME--A fun large motor footprint game!
Cut out and tape colorful footprints to the floor! Early walkers or crawlers will enjoy a straight line, while older kids might enjoy an elaborate pattern that takes them on an adventure where they may need to turn, walk backwards, etc. As you can see, this was a hit with my toddler!
And finally....
Quick and Easy Play Tip--Cardboard Shoe Box Garage!
Trust me, to the child it is just as cool as an expensive one from the store! Kids will love to drive a car in and out of a shoebox with a simple hole cut out of it.:)


Christmas Is Almost Here!
Whoops! The holiday season has been so busy, I missed a Thanksgiving blog! I'll have to include some of the fun things we did in next year's fall entry. I know Christmas also seems right around the corner, but it's not too late for some fun art and learning projects! I hope you will enjoy these ideas that are great for all ages!
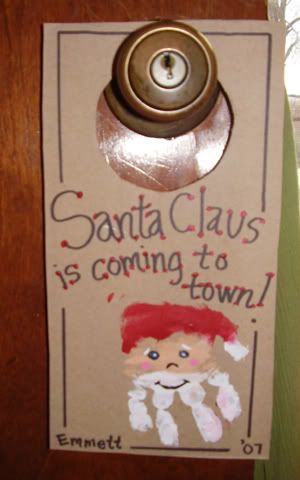
Christmas Handprint Door Hanger
This project works well for infants and preschool age children! If you have a young toddler like me, you may need to work fast! LOL. I had my work cut out for me on this one!
First, I took a piece of plain cardboard, or you could use heavy cardstock, and cut a rectangle with a circle big enough for a doorknob to fit through.
As you can see, the Santa is a handprint! Paint the bottom portion of palm and stem of thumb red, leaving thumbprint for white (ball of Santa's hat), middle section of palm whatever skin color you like, and fingertips white! So cute!
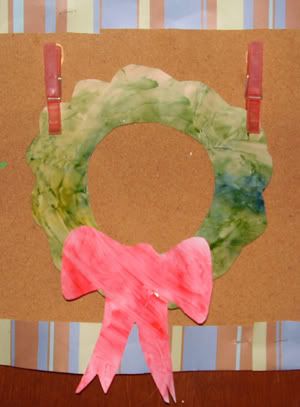
Just A Fingerprint Wreath! And variation as a gift for grandmas!
To make this wreath, I simply let my toddler go to town painting a large piece of paper green, and one red. I set them aside to dry and when they were ready, I cut the wreath and ribbon shapes out myself. Very easy!
As a variation (not pictured here), I then glued the wreath to a heavy piece of cardstock. Inside the inner circle of the wreath, I placed a picture of my son. Below the wreath, I wrote "Grandmas Make Christmas Special". I then hole punched the two top corners and strung red raffia through them for hanging. This year Emmett made one for both of his Grandmas. It was a big hit!
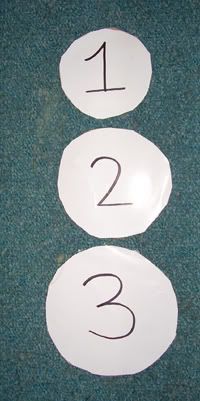
Snowman Circles-Counting, Sequencing and Seriation
I glued small, medium and large white circles to cardboard to teach my son about small, medium and large, while making a snowman! Also, counting to 3. Older kids can try making these on their own. Once children master stacking in order, cut each circle in half for matching.
Two New Christmas Songs For Kids!
I wrote this first one for my very young students as something fun that incorporated lots of movement!
The Gingerbread Man(chant)
First you mix me in the pot (pretend to mix)
Bake me 'til I'm hot hot hot (clap hands on "hot")
Run so fast with ginger feet (run in place)
Catch me (hug self) and I'm good to eat! (rub tummy)
I'm a little Snowman
(tune of I'm a little Teapot)
I'm a little snowman, short and fat
Here is my carrot; here is my hat!
When the sun comes out and shines all day
Down, Down, Down I melt away. (slowly fall to the ground)
(spoken) I'm a puddle!
And Finally...TWO great Suggestions!
File Folders for Songs (or games, activites, etc.)
This is something that I, and many other teachers I know, have done for years to help remember to incorporate songs or activities into the day. When you get an idea for a new song or activity, it's very helpful to write it down with markers/crayons/etc on the inside of a file folder. At the top, it's fun to illustrate a picture that represents the song or game, etc. Older kids can help with this task. Also write the title in the appropriate tab on the folder.
Then, you can fasten the open file folder to the fridge or other prime spot that you are apt to see it. That way, you will be reminded to do the activity with your child. The best part is that when you are ready to move on to something new, you can close the folder and file it easily into a filing cabinet, box, or drawer with the rest of your folders. It's a great way to organize themed learning for your child!
LEFT OVER WRAPPING PAPER TUBES? Ball Tunnels!
I save these tubes and recently fastened one to the wall at an angle so that my son could watch balls roll down and out of it. All I did was hot glue it (if you are afraid to do this, you can tape it, or just hold the tube yourself) to the wall at an angle, low enough for him to reach the top hole, and then I placed a basket underneath the bottom hole for the balls to drop into. Cheap fun on a snowy da
Thanksgiving Fun and Fall Ideas
The holiday season is upon us! I love making holiday art projects with kids because they are so festive, make great gifts for family members, and center peices for the holiday table!
We're getting started on fall over here with two (yep, you guessed it--parent pleaser!) fall art projects:
Cupcake Liner Owls
It's a very simple concept--we just painted a paper plate with brown paint, and then added an orange triangle piece for the face shape, a folded orange diamond for the beak, and cupcake liner eyes. Inside the eye you can place a googly eye or button!
 Paper Bag Stuffed Turkeys
For this project, you need a paper bag (size is up to you--and a family of different size turkeys would be so cute!) We colored on our bags with brown marker, and then glued multi-colored feathers I had cut from construction paper. The feathers get glued onto the bottom flat part of the paper bag. After that, we stuffed the bag with tissue paper (or whatever you have to stuff with), and twisted the end to make the neck. I had pre-cut a face shape from cardboard to which the kids glued a beak, waddle and two eyes. Then we attached the face to the neck and it was all done! It makes such a cute centerpiece!
Other fall ideas:
Indian Corn
Indian corn is an awesome science and art project all rolled into one. Kids will enjoy touching the texture of the corn and it can be used to roll intersting patterns into playdough, or onto paper with paint!
Bird seed play
Older kids can play in a tub of bird seed/deer corn/etc. For extra fun you can add fall items like pinecones and acorns, or fall shapes. Kids will enjoy scooping and pouring the seed into cups. It's a great science and large/fine motor exercise!
Scented playdough
It's fun to add essence like cinnamon, nutmeg or other fall scents to your playdough.
Playdough turkeys
Make a batch of homeade playdough and tint it brown. Buy googly eyes and feathers and store together in a tub to make playdough turkeys when the mood strikes! I love doing these, they are so much fun.:)
Fun Idea
Go on a fall nature walk. Bring a bag of popcorn with you, just for the animals. Throw handfuls as you walk. Did you know that you can pop regular corn in the microwave? You can dry pop corn in a folded paper lunch bag in the microwave, just as you would microwave corn. If you really want the squirrels on your good side, toss in a handful of peanuts.:)
Fall Book Suggestions
There are many out there but here are some of my absolute favorites!:)
 Rosie's Walk |  Red Leaf, Yellow Leaf |
 Nuts to you |  Owl Babies |
More Thanksgiving Links
More Thanksgiving Resources
This link has more project ideas and also great books on how to inspire thankfulness in your child.
Hope you have a wonderful holiday season and thanks for reading!
Rainy Day Activites--Free!
Three free activities for a rainy fall day!
The first doesn't need an explanation:
SET UP YOUR PUP/DOME TENT INSIDE!
Get out your tent and set it up! It's cleaner than a blanket fort and you can zip toys into it. It even doubles as a ball pit if you have a bunch of balls to toss in! Super fun on a rainy day. I highly suggest it!:) Emmett has been really enjoying it this week. I think daddy has been too! LOL. They have been playing together quite a bit in it.:)
MY FIRST SHAPE SORTER
Here's an idea you may have seen before. Just take a small or large coffee can and trace your block shape in the lid. It is less confusing then a shape sorter with lots of different shapes. It's not just for beginners though! Older kids (2+) will REALLY enjoy a lengthwise slit to put a stack of poker chips into. (Although they are a choking hazard for little ones). This was a top notch fave in my classroom and beat out the colorful storebought shape sorters! LOL. Kids would sit for hours putting poker chips into the can, they were mesmorized by it! Em is still doing square blocks in his and I will make a circle one soon for circular objects. I may even do a large coffee can for balls! Enjoy!
RECYCLED APPLESAUCE CUP STACKERS/COUNTERS
Do you buy packaged applesauce for your child? I do from time to time and I save my cups. These cups stack together and you can number them as high as you'd like to go. When you stack them, you can twist each cup slightly to the side and the numbers go right up in a nice cascade! It's nice that the ascending numbers are visible in a row, like this:
As you can see I've put the corresponding number of dots on the bottom for counting to match the number on the side. When Em is older (2 1/2 or so), we will use these as cup counters for beans, marbles, paper clips, etc.:)
So there you have it. Three free rainy day activities!:)
Fall, Harvest and Halloween Ideas!
Hey everyone!
I've got some cute art ideas here, one science project that is a spinoff from another that I've posted recently, two songs and a game!:)
I hope you enjoy. Read on!
THREE FALL ART PROJECTS FOR INFANTS, TODDLERS OR PRESCHOOLERS!!!
FINGERPRINT FALL TREE
This is such a cute project and quite simple. You just take a piece of construction paper, and either draw, paint or glue on a tree trunk base. I've used a tree trunk shape I cut out of a paper bag here, and glued it on.
Next you take your child's fingertip and dip it in fall leaf colors--I chose red, yellow, orange and brown for this. Also, I mixed my paint with a bit of Elmer's glue, because I knew that I wanted to shake glitter on afterward.
Next you just press the child's fingertip all over the tree! I decided to outline the basic shape of the tree once I was done with a permanent marker. My son was very interested in this project and I think it is one that will work well with children of all ages, even very young babies! Very cute.:)
PAPER BAG PUMPKIN
The cutest centerpiece ever! First, I took a medium size paper bag (any size will work, and if you make it a family project it is really cute to do different size bags for a little variation in your "pumpkin patch") and then I had Em fingerpaint it orange with some shimmer and glue mixed in. He did his thing and played in the paint for a while, and when he was done, I added the nose and mouth. Ofcourse older kids will really enjoy cutting and glueing their own eyes and mouth!
Then, I shook some red and orange glitter over the pumpkin and allowed it to dry a bit. Next, I stuffed the bag with 10 or so plastic bags to make it nice and fluffy, and twisted the top off to resemble a pumpkin vine. As a finishing touch, I made a pumpkin leaf out of green construction paper and added a bit of green rafia. All done and soooo cute!:)
WHITE HANDPRINT GHOSTY
A cute all ages Halloween project! Very simple to do--just take some white tempera paint and paint or dip your child's hand in it, and then apply to black construction paper! Ofcourse, I wanted to add glitter (yes, I'm a glitter ADDICT--LOL!) so again, I added glue to mine.:) Then I wrote, "BOO!" on the paper.
COOL VARIATIONS:
For awesome "poofy" ghost paint, try mixing white elmers glue with shaving cream! Dries poofy! So cool!
Instead of a handprint, have your older preschool age child glue marshmallows within a ghost shape that they have drawn, or you have drawn for them.
Try adding googly eyes to ghosts!
Add pumpkins to your ghostly scene with orange fingertips! Remember though--in order for orange to show up on the black tempera you will need to mix some white tempera into it.
HOPE YOU ENJOY SOME OF THESE FUN ART PROJECTS WITH YOUR CHILD!!!!:)
On to the science project--
COLOR EXPLORATION BOTTLE
Ofcourse, this is a spin off from the exploration bottles I've already posted. But I plan on adding all different color bottles to Em's science center, one at a time, and I thought October was the perfect month to introduce him to "orange". Simply find a small bottle with a tight fitting cap, fill with water (add GLITTER if you are a glitter addict like me!!!) and then objects of your theme color. I used orange beads in this one, and then finally taped the word "orange" around the bottle as well.
FALL THEMED SONG
I'm a Little Acorn Brown
To hear the tune of this song, download the midi file here:
Acorn Brown Tune: http://www.magicroot.net/supermoms/acorn.mp3
The "cluck, cluck" that you see is the sound of your clicking tongue.:)
Im a Little Acorn Brown
Lying on the cold, cold ground
Everybody steps on me
That is why I'm cracked you see
I'm a nut (say "cluck, cluck" and tap the top of your head with your closed fist)
I'm a nut ("cluck cluck")
I'm a nut, I'm a nut, I'm a nut ("cluck, cluck")
This song may seem silly but I will tell you, it is one of the ALL TIME favorites of my music students during the fall season. I guaruntee your child will love it.:)
And finally...a fun game!
"Hide The Pumpkin"
Well, it might be a no brainer, but it will keep your preschooler or toddler busy for quite a while! You can use real mini-pumpkins or a pumpkin piece of paper, or any other fall themed item. Tell your child to close their eyes and face the wall while you hide the pumpkin somewhere in the room. Then ofcourse, they try to find it!
For babies and toddlers, you can hide the pumpkin right in front of your child, inside a box, under a couch cushion, or under the edge of a blankie, and watch them come scrambling right away to get it out.:)
Simple fun that encourages great problem solving skills.
That's about it for now! Check back with me soon for more early childhood tips!:)
Cheers!
Channy
Fun paint tips:
To make your paint dry shiny add a bit of corn syrup to your tempera or fingerpaint. Fun, but sttttticky!!!
Another tip: add a drop of dish soap to increase washability. Watch for paint in the mouth on this one, although it is non toxic soap causes a bellyache.
Also, you can fingerpaint with shaving cream/food coloring (careful, this will stain but it is non-toxic. Better for older babies/toddlers because sometimes shaving cream can irritate the eye).
Super cool foam paint: shaving cream plus white elmers glue! Dries poofy!
Window clinging paint, if you are brave enough to let your little one paint the window (I love doing this, it's so cute): Mix elmer's glue and tempera paint or add food coloring to Elmer's glue. Easy to scrape or wash off. For easier washing try vinegar water.
Also, try kool-aid and pudding! Totally edible, great for young babies (that can have a bit of dairy ofcourse--only the amount that they can lick off their fingers). Careful though, it will stain whites.
Hey Everyone!
A while back I posted that I would put up some of the signs I have used with toddlers/babies in the past...and these are also the first ones I plan on using with my son....
They say that the best time is around five or six months...but there are some signals your child will send you when they are ready. For example, they may begin to shake their head for "no" and nod for "yes". Or try to communicate through other ways such as grunting or pointing. Contrary to popular belief, baby signs DO NOT delay speech, so if you are interested in using them with your child, you needn't worry about that!
The most important thing is to just start out with a few and stay very consistent with them. ALWAYS say the word as you use the sign. Have fun!
I will soon be posting some songs in sign language as well!

There are many more but I thought I'd share a few I plan on starting with!
I've been making and using these in my classroom for years and years. They are so much fun and talk about cheap entertainment. I just recently thought Emmett would dig it and decided to make some for him! It has become his new favorite toy. They are so stimulating for young children! Here is a pic of the ones I recently made:
Exploration Bottles
Exploration Bottles
All you need to get started is a clear bottle with a tight fitting cap. I used a Juicy Juice bottle for the big one, and two different size Victoria Secret/Bath and Body works bottles for the other two. Small pop bottles work wonderfully too! You just add interesting colorful things and make very sure to seal the cap very tightly. Because I want to be extra safe about choking hazards, and to avoid leaks, I also tape mine off with masking tape.
I added things to the dry bottle (the big one) like popsicle sticks, ribbon and raffia, a pencil, beads, and even fake doll hair! Yes, I have that laying around. LOL! The dry bottles are alot of fun because they are full of neat sounds, so if you do more than one, make sure to try one without adding water so your little one can be fascinated by the rolling and clacking sounds of things inside.
On the water bottles, I added food coloring, glitter, beads and foam shapes.
So there you have it! Cheap entertainment in a bottle!
Other ideas for the liquid filled ones:
--Oil, food coloring, water
--dish soap, food coloring (gets all neat and sudsy when shaken!)
--action figures, small cars, etc.
Pretty much anything you can think of!
PS--Bigger kids can use two liter bottles for the water exploration ones, but the smaller sizes just seem to fit better in small hands.
Hope you enjoy!
Ideas to help kids clean up
When you are caring for young children at home or in preschool for years as I did, one of the biggest struggles can be getting them to clean up and pick up. The self help skills are really hard to start late, and it's always a good idea to start them as early as possible to create great habits.
For that reason I thought I'd share something I recently did to help Emmett start to learn how to pick up and some other tips I have based on my experience.
Shelf Labels--This really, really helps young children. You take a picture of your toys, and tape the picture to the shelf or near the wall where it goes! For starters, they can SEE where the toy's place is. Also, now cleanup isn't just a chore, it's a matching game! Make sure you laminate or cover in packing tape well. Here are the ones that I made for Emmett's room--trust me, it's never to soon. I also included the name of the toy so he can be exposed to letters/words while he picks up!
You also might find these helpful:
Clean Up Songs:
They really work. Children hear the song and switch into working mode. It makes it more fun ofcourse, but music is a very powerful form of conditioning as well, and it helps cement the focus for the task at hand. I've used this one for years, and yes....(roll eyes) it's from Barney! LOL. It goes like this:
"Clean Up, Clean Up
Everybody Everywhere
Clean up, Clean Up
Everybody Do Your Share"
and this one:
"It's time to put things back where they belong
Clean Up, Clean Up, Clean Up Song
Let's Clean them up by the end of this song!
Clean Up, Clean Up, Clean Up Song!"
Either can be sang to any tune or simply chanted while you clap. Also effective is clean up "music" which can be anything you want it to be!
Other ideas:-You can make it a game by having a clean up "race" or only cleaning as long as the music is playing, which can help younger children who dread the task. They foresee a tangible "end" to the task which makes it much more tolerable.
-You can count items as you pick them up, or tell the child to pick up things by category, like "Find all the blue toys".
-Give kids a choice, "You may pick up the cars or the blocks today. I will help you. What do you choose?"
-Last but not least, the best tool you can ever use for clean up with a young child is a kitchen timer! Once they learn to understand it's meaning, the timer is SUCH a powerful tool. Always stick to a short amount of time with young children.
A Home Made Water and Sand Table
I am SO excited to share this idea!
I don't know if anyone here is aware of this, but water and sand tables for toddlers and children are VERY VERY expensive.
I was racking my brain, trying to think of how I could re-create one at home for cheap...when it hit me!
CHANNY'S HOME MADE WATER TABLE!!!
Take a medium to large sized rubber maid or plastic tub. Find a small plastic bin, and trace it's shape on the top of your lid. Using heavy duty scissors or a "Sawsall", cut the hole out of the lid and place the bin snugly inside. Fill with water or sand and replace lid on bin.
Now you have an activity table that doubles as a storage bin for the water/sand toys!!!!! Wahoo!!!!
To make it an even more stable structure that kids will have a hard time
tipping or dumping, put a bag or two of sand in the bottom. Then it becomes nice and sturdy.
Ofcourse never leave your child unattended with one of these.
Here it is!!!!!!:

PAPER PLATE FISH MOBILE

All you really need to get started is paper plates (I used small ones but it doesn't matter), scissors, glue, paint and glitter, some string, and something to hang with. In the past I've used dowels and sticks shaped in a cross formation to hang mobiles, but I kept this project super simple by just attaching it instead to a child's coat hanger.
Start by keeping 2-3 plates whole (how ever many fish you want to hang) and then cutting tails by simply cutting paper plates in half. I tape the plates down to Emmett's highchair so he can fingerpaint them more easily. Also, I wanted my fishies to have open mouths, so I cute triangles out where their mouths would be as well.
Today, I mixed my tempera paint with glue for two reasons: 1) I wanted it to dry more shiny 2) I wanted to shake on glitter after Emmett had painted them. Also, it made it easier to clean off the highchair when we were done!
Once we were done painting the plates, I shook glitter on them, hole punched the top of the body so I could run string through them, and glued on button eyes. You could use googly eyes, or just draw them on, or you could skip the eyes alltogether and it would still look great! Because I have used buttons for the eyes on the fish I will make sure to keep a close eye on them, and keep them out of Em's reach, in case they should fall off and be a choking hazard!
So, once they were dry and I had glued the tails and eyes on, I just strung them up with sewing thread and tied them on to a child's coat hanger! Voila! The glitter catches in the sun and it looks so darling. Emmett is really mesmerized by it!